The Minimalist’s Guide to Homelab Setup
On this page
Welcome wanderer!
If you’ve clicked on this blog, you either stumbled upon Ankra and are finding out how it can accelerate your productivity, or are just curious about building homelab in simple steps.
By the end of this guide, you will have a WordPress blog hosted on your homelab, accessible securely from anywhere via a Cloudflare tunnel.
Before we dive right into it, here are the recommended prerequisites to go ahead. In case you don’t meet the requirements, don’t worry, we got you covered.
- Ankra account: head out to ankra.ai to create one if you already don’t have one
- A Kubernetes Cluster: It does not have to be on a cloud provider. You can have a small single node cluster with kind or minikube.
- A domain of your choice: This is so that all your applications can have a subdomain of your choice. A domain on cloudflare or godaddy can help you access your homelab applications from anywhere in the world. If not, you can have a domain locally in your home network.
Setting up your cluster
Now that we have out prerequisites covered, let’s start with setting everything up.
Upon creating an Ankra account, you shall be prompted to import a Kubernetes cluster, follow along.
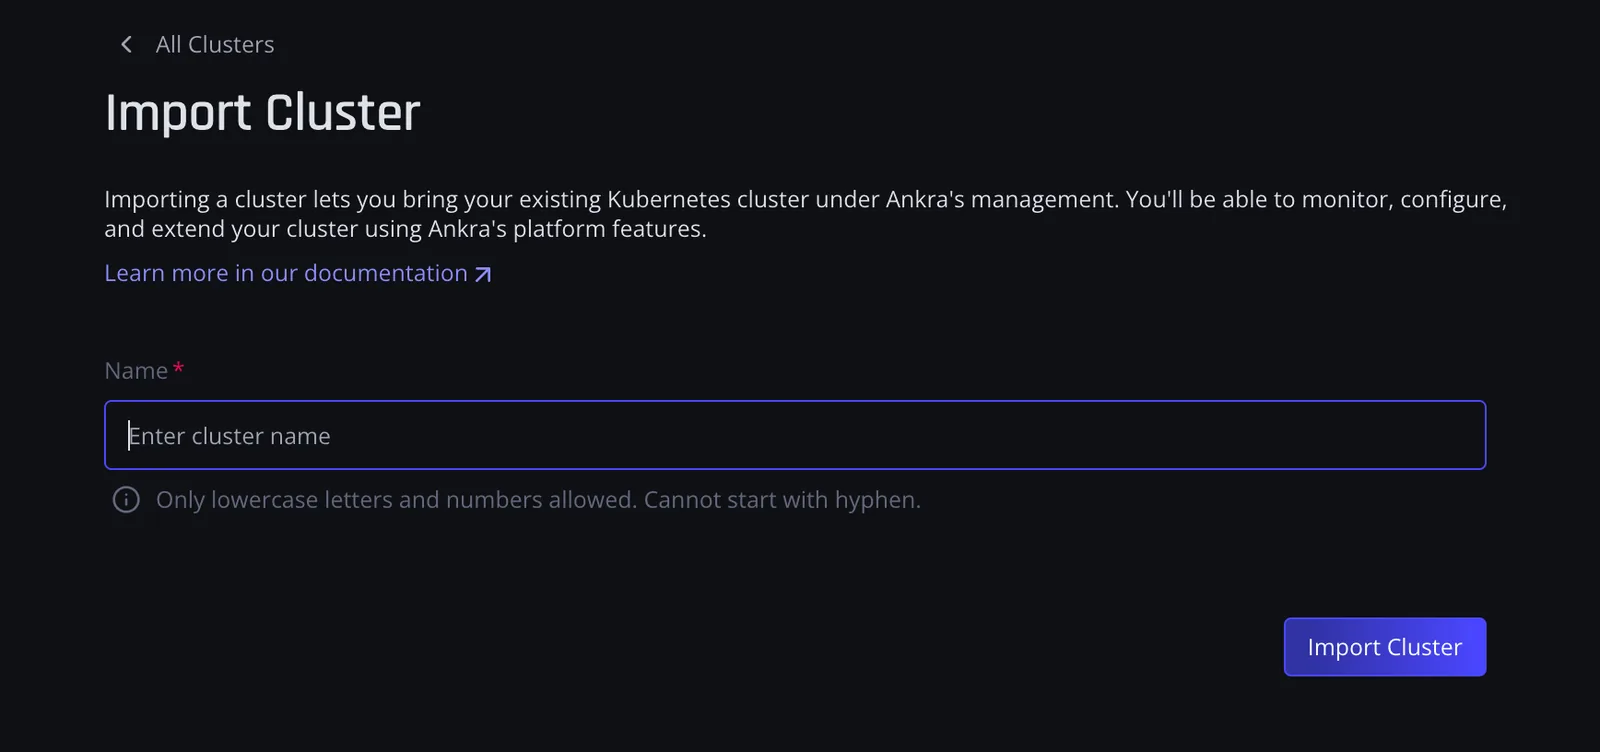
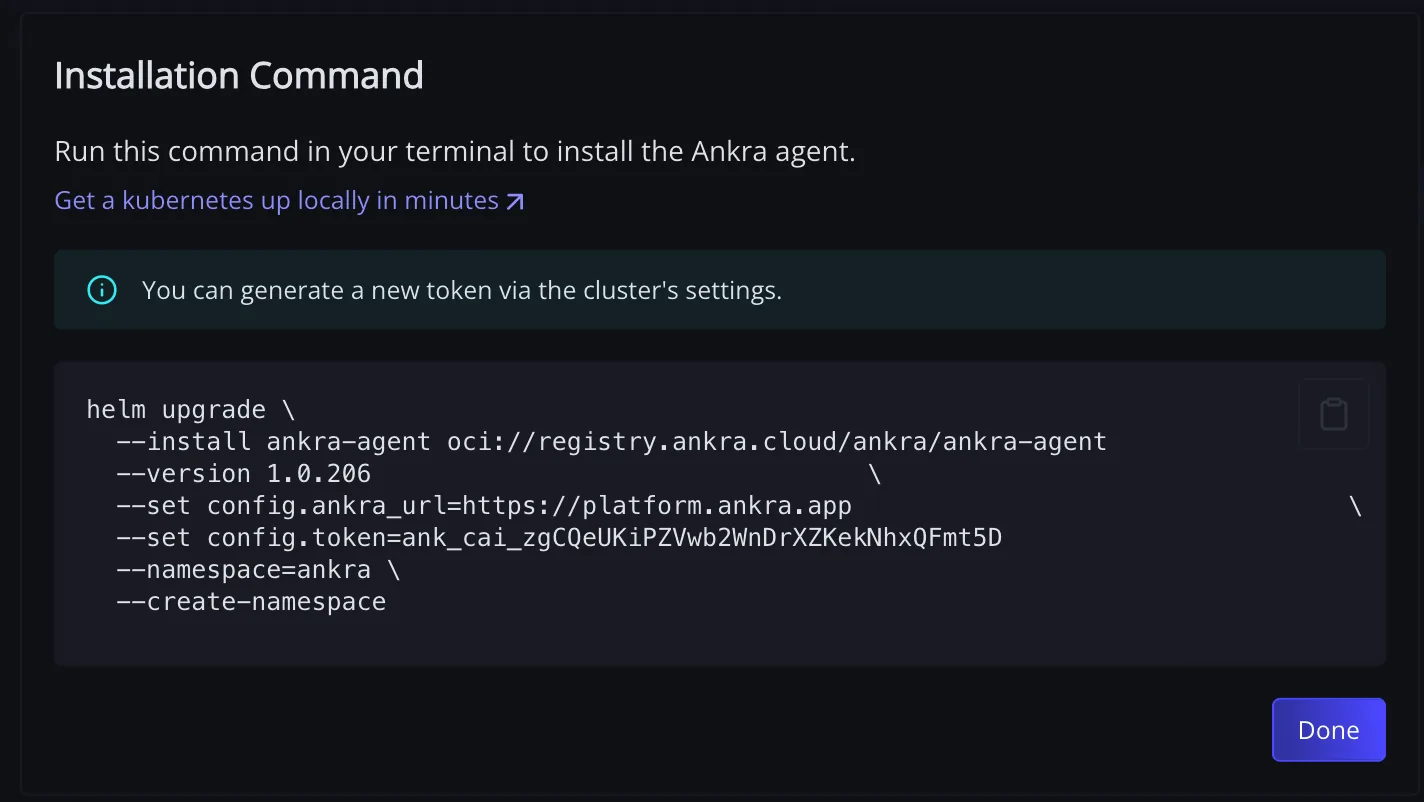
Once you give it a name and click on import, you get a pop up to install Ankra agent on your cluster.
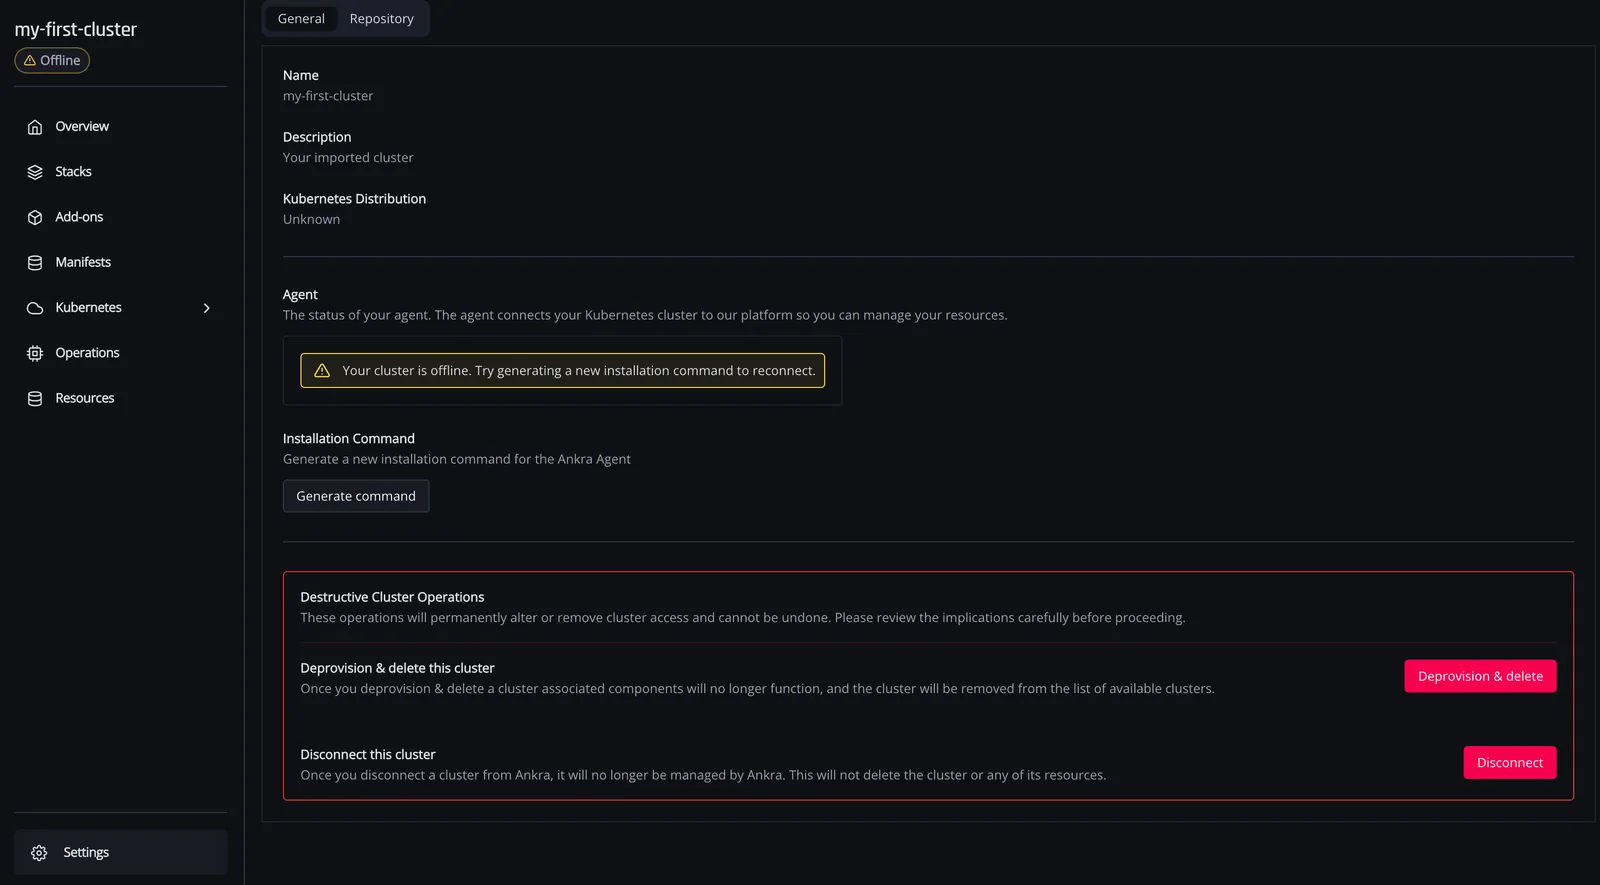
If you forgot to copy the command, you can always go to settings and click on generate command like below.
You should see this if the command has run successfully

Now that we have connected our cluster, it’s time to deploy some stacks.
To begin with, we need to connect a github account/repository so that a backend IAAC can be configured. Click on stacks on the left pane
Setting up IAAC
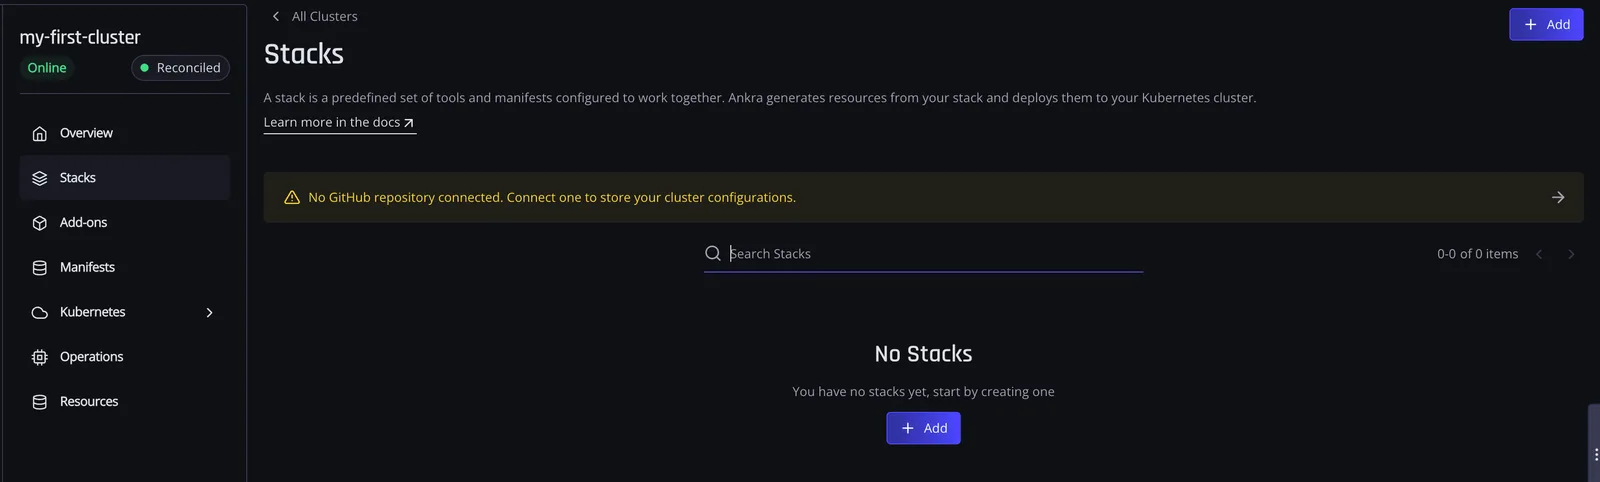
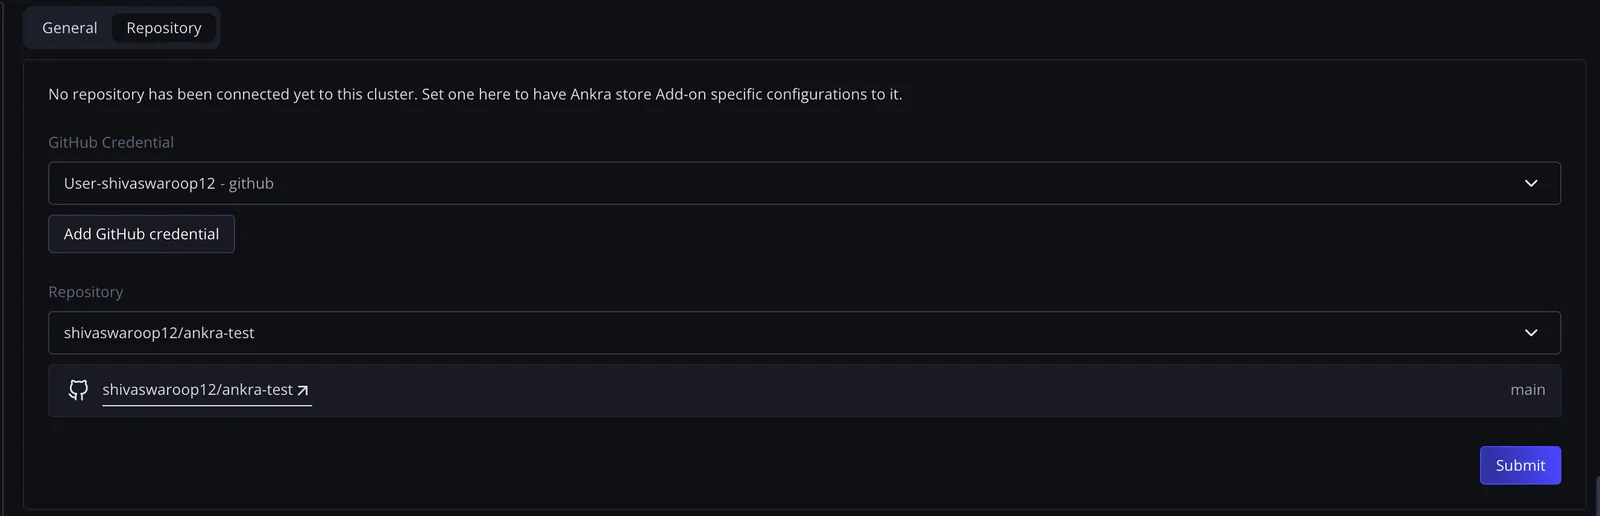
Once this is done, any applications you add/update/delete on the UI will reflect on your repository and vice-versa.
It’s important to know that all kubernetes manifests will automatically be committed to the git repository you connect Ankra with. Make sure you do not commit any secrets/api keys to a public repository.
I have a cloudflare domain shivu.io and I want to deploy a wordpress app on the homelab. Wordpress can be used for various things. I want to have a handy workspace for all my blog ideas and it’s a great tool for that purpose.
Once the stack is deployed, I will have a wordpress.shivu.io deployed with ssl enabled, so the website will be https and I can access it from anywhere on the internet.
Deploying your stack
A stack on Ankra is a set of applications logically put together in the form of a interactive flowchart. Ankra supports applications as Addons (helm charts) or Manifests. For my stack, I will have the following applications.
- Wordpress: Community helm chart as an Addon
- Cert Manager: Community helm chart as an Addon for certificates
- ClusterIssuer: A single manifest additional to the add on to specify cloudflare as my domain issuer.
- Cloudflared: Community helm chart as an Addon for tunnelling locally hosted applications to the internet.
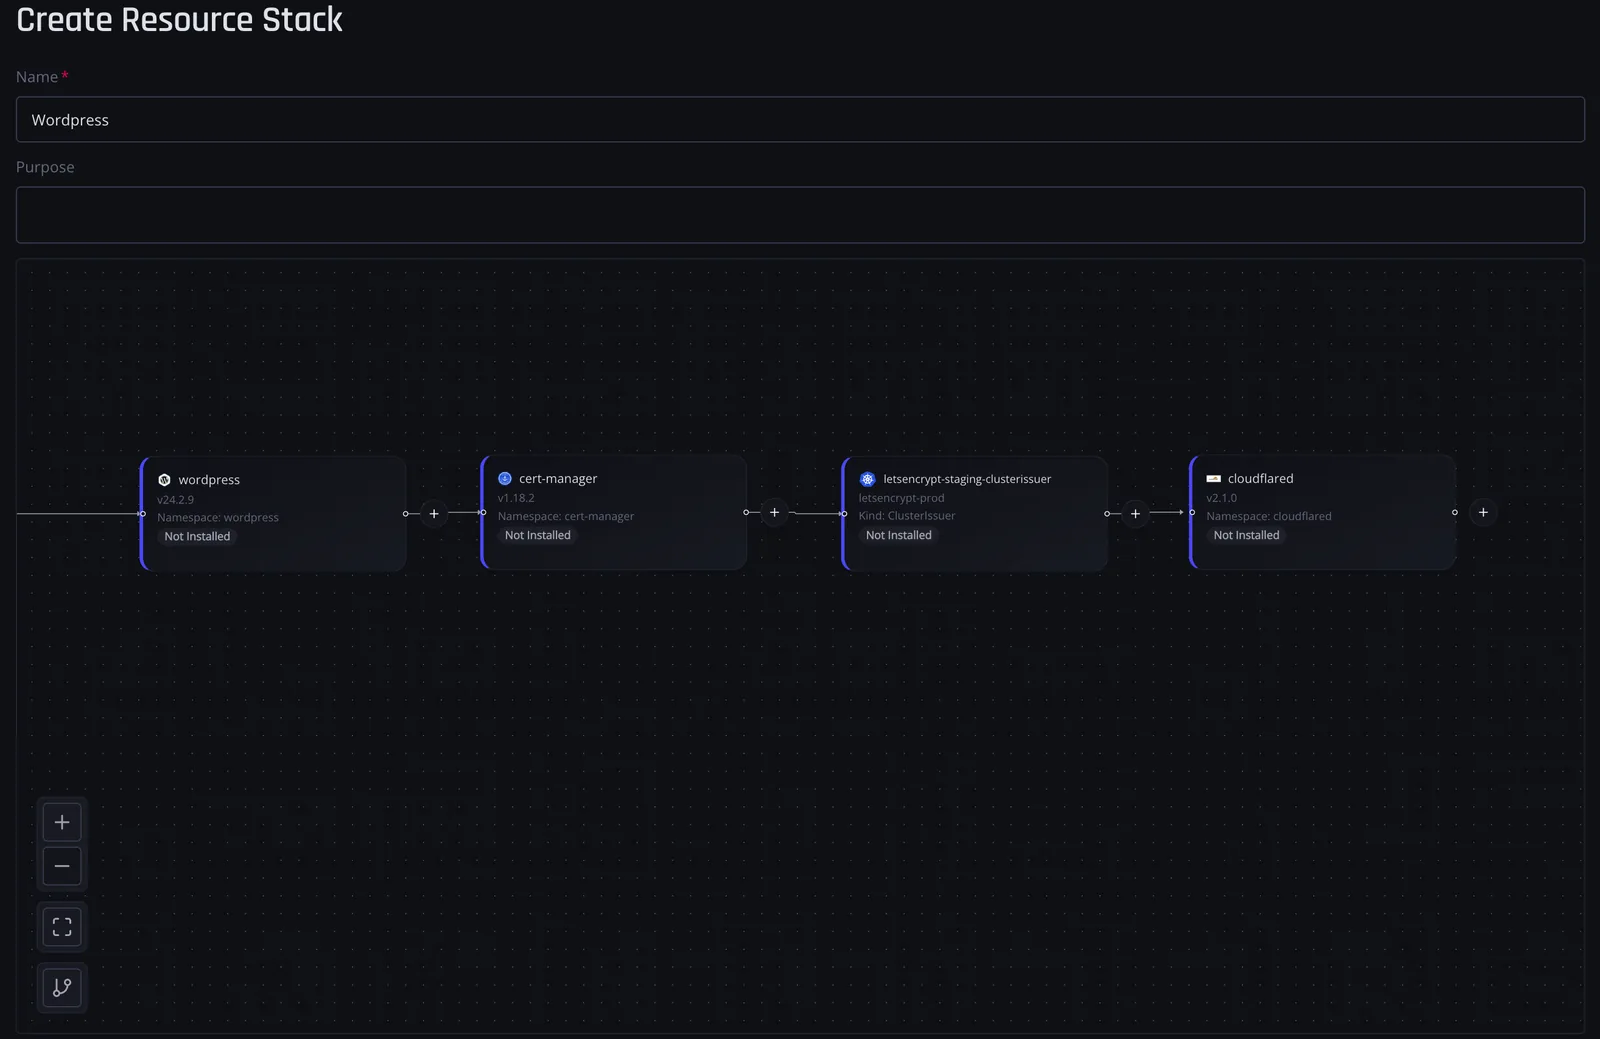
The values.yaml for all these are as below
# Global parametersglobal: imageRegistry: "" imagePullSecrets: [] defaultStorageClass: "standard" security: allowInsecureImages: true
# Common configurationkubeVersion: ""nameOverride: ""fullnameOverride: ""commonLabels: {}commonAnnotations: {}clusterDomain: cluster.localextraDeploy: []usePasswordFiles: truediagnosticMode: enabled: false
# WordPress Imageimage: registry: docker.io repository: bitnami/wordpress tag: latest digest: "" pullPolicy: IfNotPresent pullSecrets: [] debug: true
# WordPress ConfigurationwordpressUsername: adminwordpressPassword: devpassword123wordpressBlogName: Dev Blogpersistence: enabled: true storageClass: "" accessModes: - ReadWriteOnce size: 2Gi
# Deployment SettingsreplicaCount: 1updateStrategy: type: RollingUpdateschedulerName: ""terminationGracePeriodSeconds: ""topologySpreadConstraints: []priorityClassName: ""automountServiceAccountToken: false
# Resource AllocationresourcesPreset: "nano"resources: requests: cpu: 100m memory: 128Mi limits: cpu: 250m memory: 256Mi
# Service Configurationservice: metadata: name: wordpress type: ClusterIP ports: http: 80 https: 443 clusterIP: "" loadBalancerIP: "" loadBalancerSourceRanges: []
# Database Configurationmariadb: enabled: true architecture: standalone auth: rootPassword: rootpassword database: bitnami_wordpress username: bn_wordpress password: dbpassword primary: persistence: enabled: true storageClass: "" accessModes: - ReadWriteOnce size: 2Gi
# Disable Production Featuresautoscaling: enabled: falsepdb: create: falsemetrics: enabled: falsenetworkPolicy: enabled: falsememcached: enabled: false
# Development-Specific OverridesallowEmptyPassword: truewordpressSkipInstall: falseoverrideDatabaseSettings: trueTo ensure WordPress runs smoothly without crashing or timing out, it’s crucial to configure resource limits and requests in your Helm chart values. For example, setting modest CPU and memory limits helps Kubernetes manage pod stability and readiness checks effectively.
One additional thing that cert-manager requires is the cloudflare api token to create certs for the domains configured.
You can create this by executing:
kubectl -n cert-manager create secret generic cloudflare-api-token-secret --from-literal=api-token=<YOUR_CLOUDFLARE_API_TOKEN>installCRDs: trueapiVersion: cert-manager.io/v1kind: ClusterIssuermetadata: name: letsencrypt-dns01spec: acme: email: <your-email> privateKeySecretRef: name: letsencrypt-dns01 server: https://acme-v02.api.letsencrypt.org/directory solvers: - dns01: cloudflare: apiTokenSecretRef: key: api-token name: cloudflare-api-tokenIn order to configure cloudflared tunnel, you need a couple of things. In order to generate them. Install cloudflared locally. Setting this up might take a while if you are new to cloudflare, but the docs are clear and concise.
- Pem certificate: Upon login, a pem file is generated.
- Config File: Upon creation of a tunnel, a config is placed in ~/.cloudflared/config
tunnelSecrets:  base64EncodedPemFile: "<base64 encoded pem file>"  base64EncodedConfigJsonFile: "<base64 encoded config.json"
replica:  # -- This will use DaemonSet to deploy cloudflared to all nodes  allNodes: false  # -- If previous flag disabled, this will use Deployment to deploy cloudflared only number of following count  count: 1
tunnelConfig:  name: cloudflared-tunnel  metricsUpdateFrequency: 10s  logLevel: info  warpRouting: true

ingress:  - hostname: wordpress.shivu.io    service: http://wordpress.wordpress.svc.cluster.local:80  - service: http_status:404
Click on apply on the bottom of the page and you’re good to go.
In order to access your wordpress on the browser, you must add the URL of your tunnel as a CNAME record on the cloudflare dashboard.

The target here is <tunnel-id>.cfargotunnel.com. The tunnel-id can be fetched from the cloudflare dashboard or the first line of the cloudflared logs.
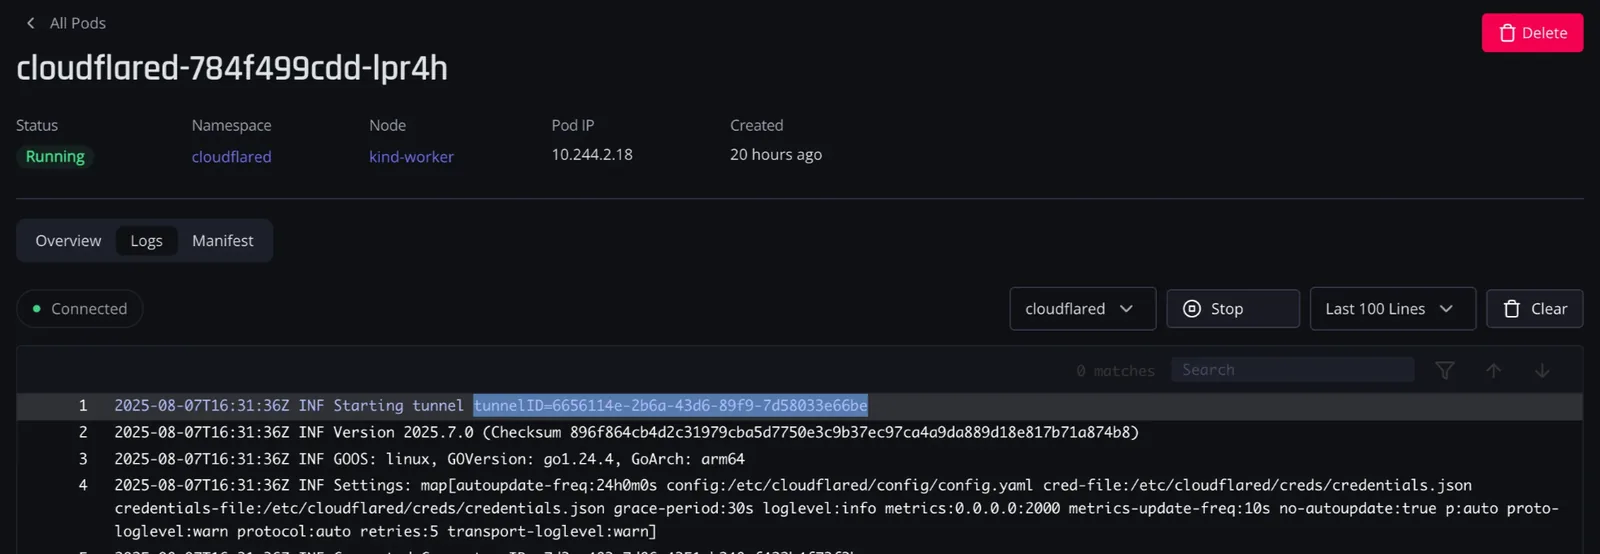
A quick clarification: The Cloudflared tunnel works independently from Kubernetes ingress controllers. While Kubernetes ingress manages traffic routing inside your cluster, the Cloudflared tunnel securely connects traffic from Cloudflare’s network to your cluster. Think of Cloudflared as the gateway that tunnels external requests safely, whereas Kubernetes ingress handles traffic once inside the cluster.
Accessing your application
If everything goes well, you should see this on your hostname
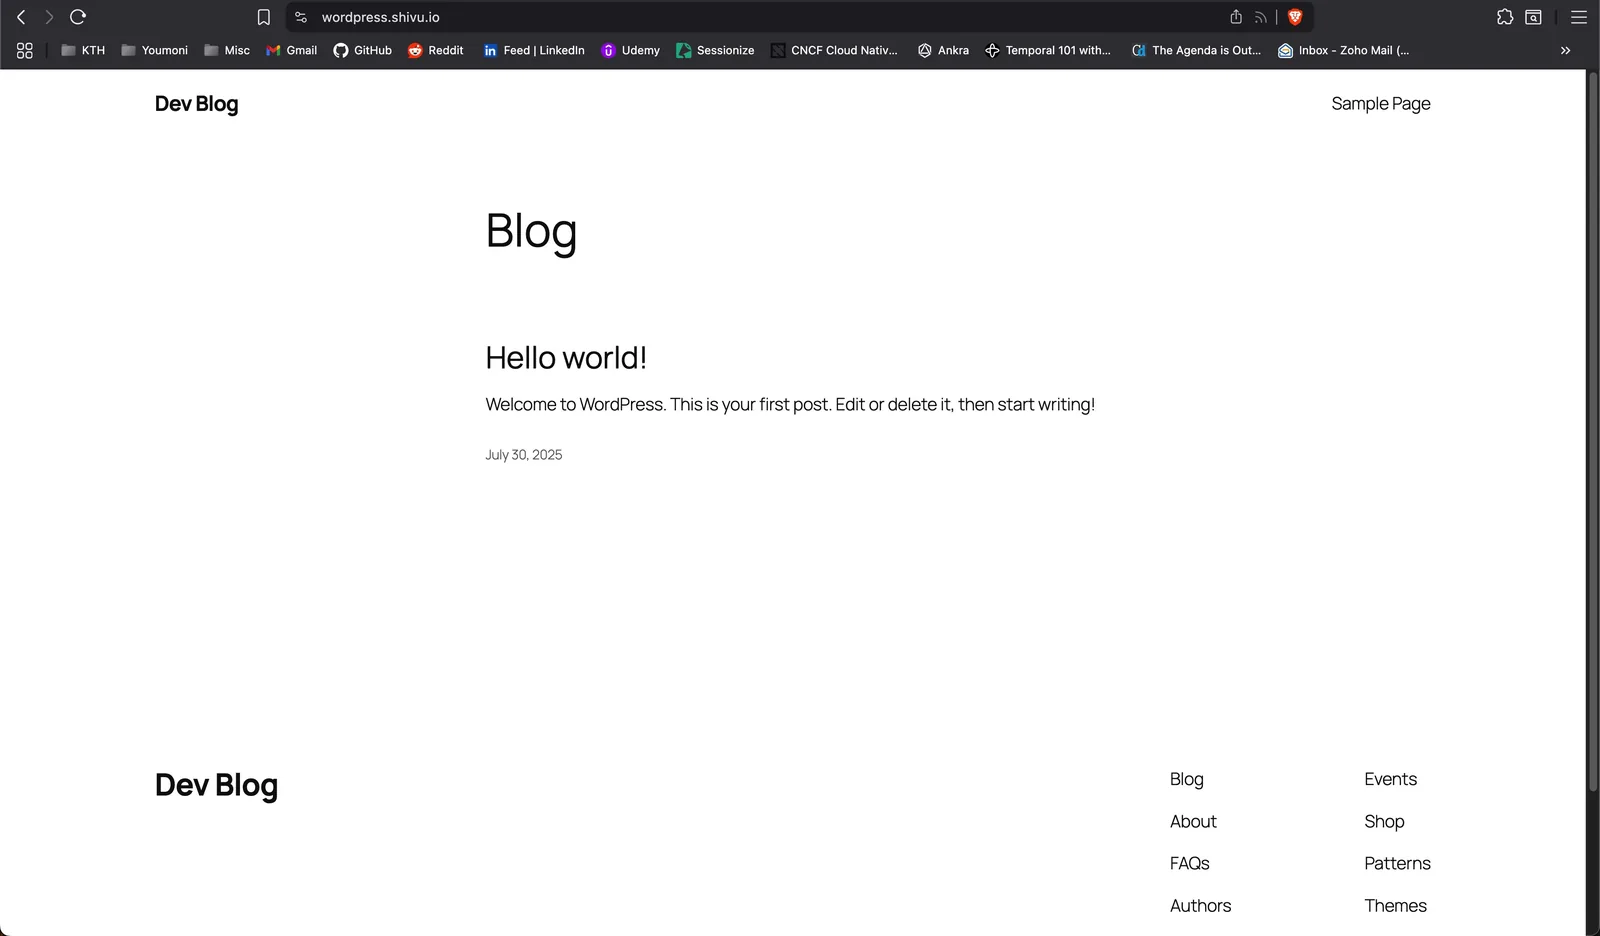
Common points to debug:
- Check the logs of cert-manager if it has created the necessary certificates
- Check the logs of cloudflared pods if it has registered the tunnel
- Check the wordpress logs if it is serving traffic
- Check the initial cloudflared values.yaml to make sure you’ve provided the right names for the service, hostname and namespace.
Join our slack: Join Community
Follow us on: LinkedIn, GitHub
Contact us: [email protected]
Get the next post in your inbox
Related Posts
Kubernetes Management Platforms in 2026: 10 Options Compared
Rancher, OpenShift, Spectro Cloud, Kubermatic, Portainer, Mirantis, Platform9, Azure Arc, Omni and Ankra compared, with who each fits.
Rancher Alternatives in 2026: 8 Options for Managing Kubernetes Clusters
Eight Rancher alternatives for 2026 compared side by side, from OpenShift and Spectro Cloud to Portainer and Omni, with when each one fits.